Free Model Download
Filament Storage Shelf
You know the drill. Vacuum bags sliding around in a bin, open spools stacked wherever they'll fit, and a five-minute excavation every time you need a specific material. I got tired of it. So I took the classic office paper tray, made it heavy-duty, and built it specifically around the 3D printing workflow.

Downloads
Get the Files
All files are published on Creality Cloud with full slicer profiles baked in. Download the 3MF for the fastest path from file to printed shelf.
Every download through Creality Cloud earns points that help keep my models free and my pages running. If you have an account, downloading from there is the best way to support the work at no cost to you.
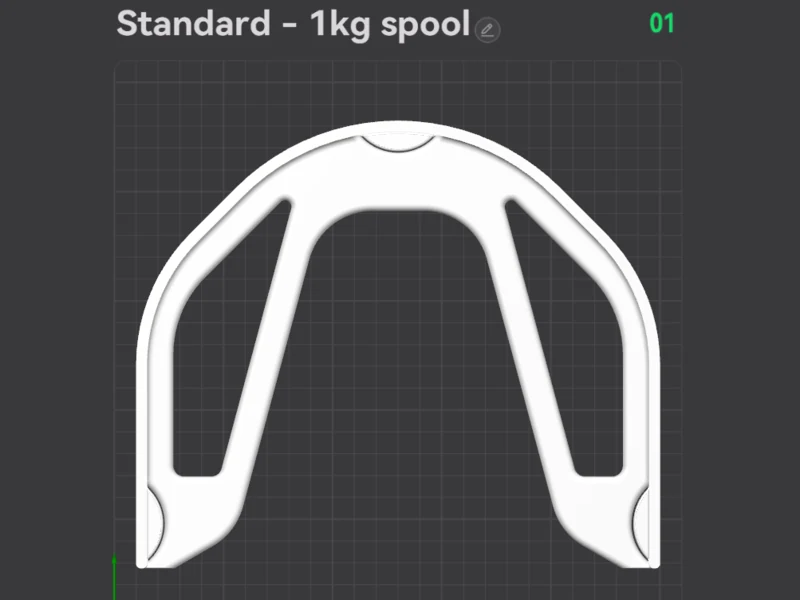
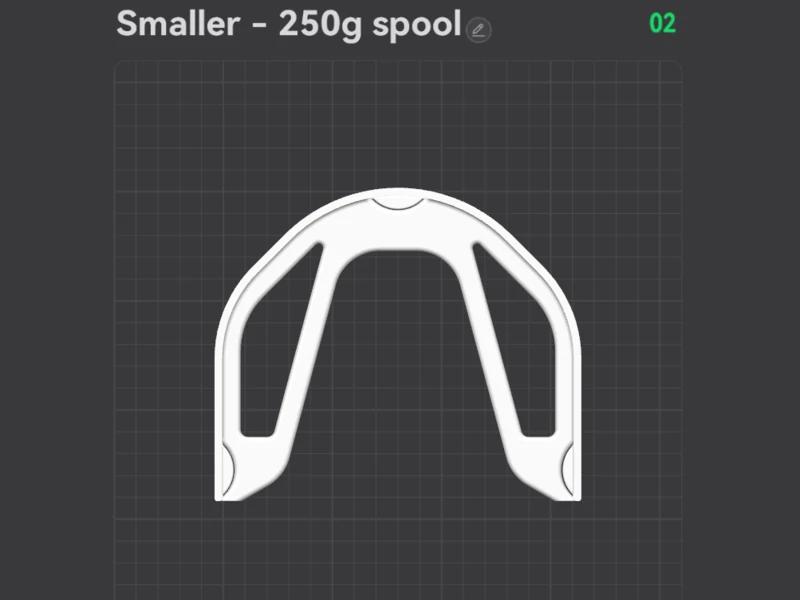
Download on Creality CloudThe 3MF is the faster path — open it, pick Standard – 1k spool or Smaller – 250g spool, and slice. A full print & assembly guide is attached to the Creality listing.
The same guide attached to the model listings, hosted here so you can read it before you print —
What's Included
Two Plates, One Project
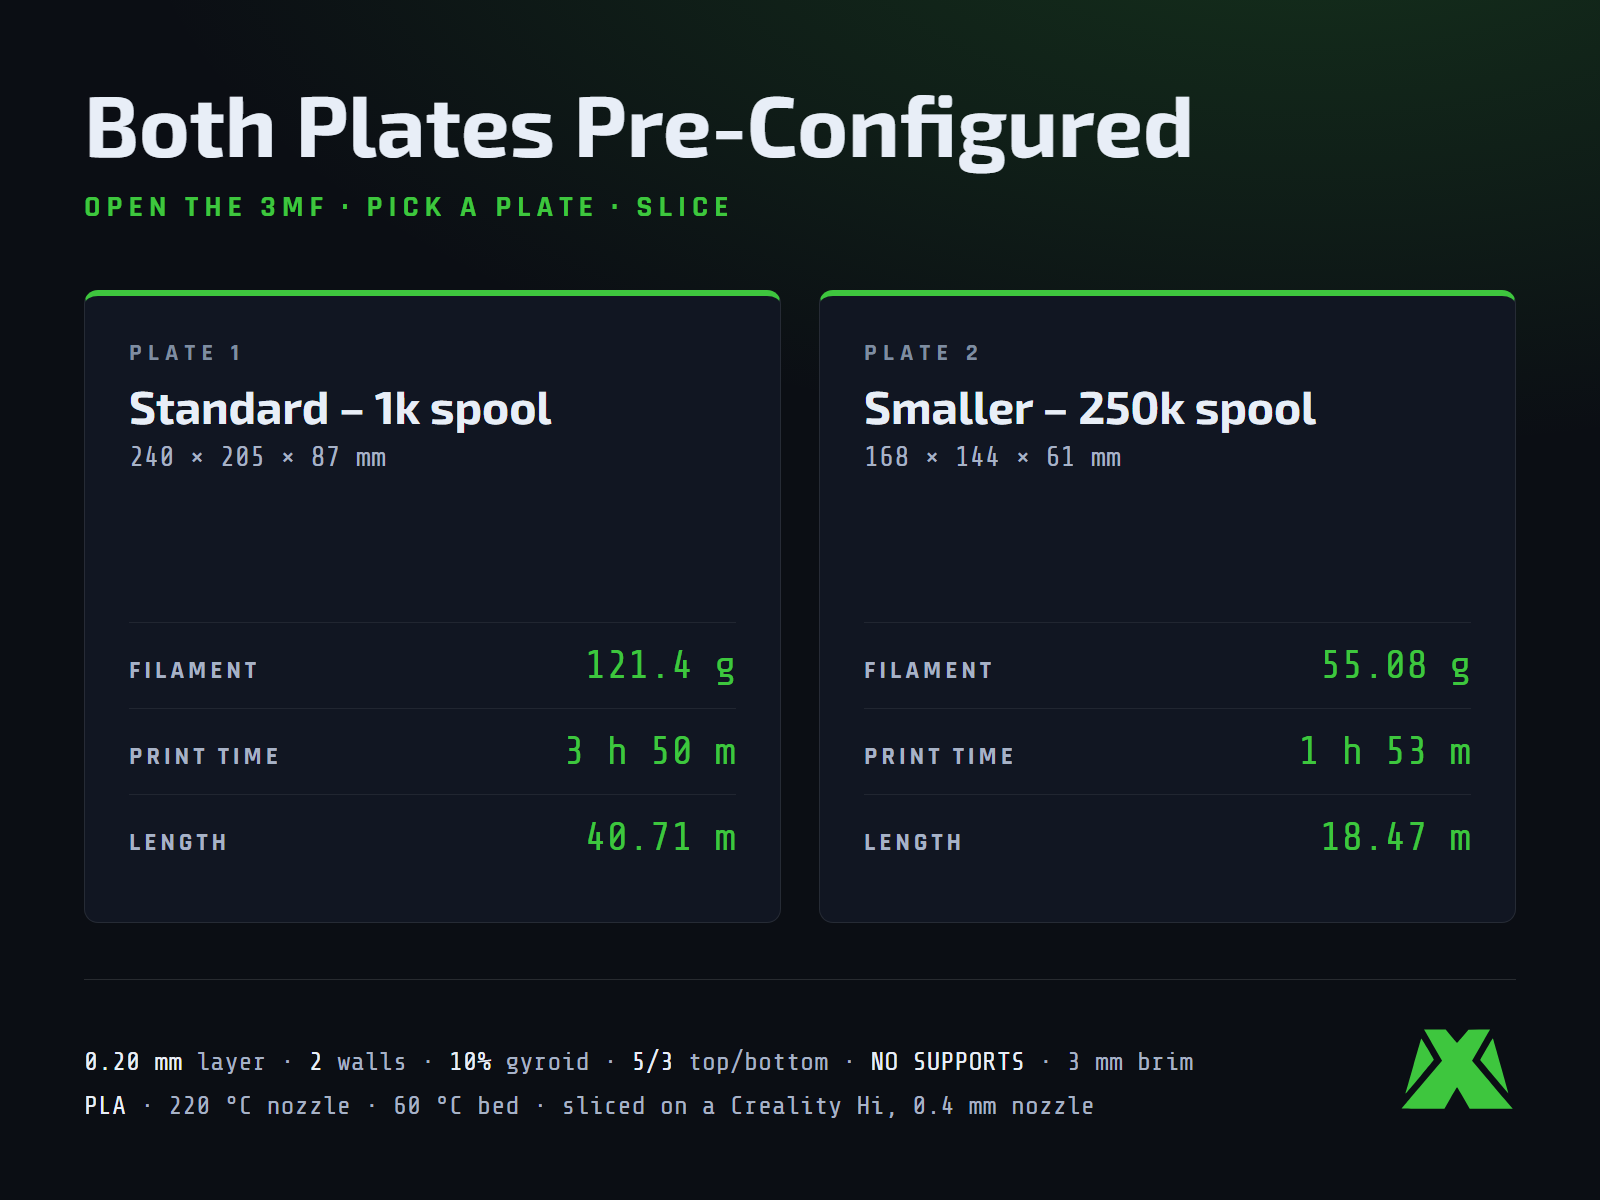
Both sizes travel in the same 3MF with their profiles baked in. Open it, pick the plate that matches your spools, and slice.
Print Settings
Slice It Right
These are the settings used on the reference prints. The 3MF includes the full profile — open in Creality Print or any compatible slicer and it's ready to go with no adjustments needed.
The Family
Name Your Stacks
Everything below is built around this same shelf, and each one is a separate model on my Creality profile: top labels, the wide bar that caps a finished column and names the material in that stack; insert labels that sit inside a tray alongside the spool; and side labels that friction-fit onto a tray's side wall so the material stays readable when the column is stacked high.
More models and tested slicer settings on my Creality Cloud profile.
View ProfileReleased under CC BY-NC-ND 4.0 — free for personal use, credit appreciated, no commercial use or derivatives.